

Setup & config guide for Crowdstrike Falcon API integration
Setup and Config Overview
This is a summary overview, a more detailed description can be found on the next pages
- Download the binary and config template to a local system
- Setup a subscription on ticura
- If not already done: Create Crowdstrike Falcon API Keys
- Setup and configure the importer
- Run the import, setup to run continuously
- Check for any issues
Download the Ticura Importer
- The importer needs to be downloaded, setup to run in the customer environment and configured.
- Currently supported Platforms are Windows(Intel) , Linux(Intel) and MacOS (Intel/Arm)
Create a Ticura Subscription
Create a subscription by either
- follow the steps described in the getting started documentation (login required): https://app.ticura.io/support/getting-started -> section
Ticura Source Recommendation Assessment – Wizard
OR
- Create a manual subscription from a search result at https://app.ticura.io
OR
- Create a subscription using the IOC Source list - On the Ticura feed configuration page, select CSFALCONAPIV1 as the output format and write down the provided API Key.
Configure Crowdstrike API Key
You need to update the config template with your individual Crowdstrike API Key. You can create API keys that allow the ticura client to access the Crowdstrike API and process custom IoCs
- Login to your Crowdstrike Console
- On the left side, select the
Support and Resources
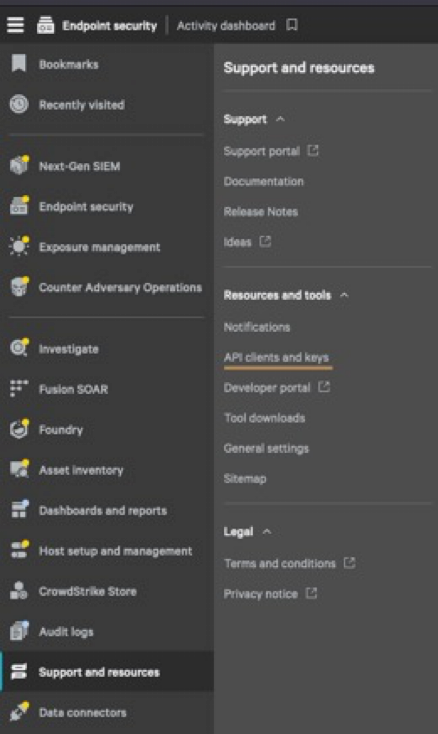
- Under
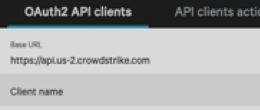
Resource and Tools, selectAPI clients and Keys - write down the displayed Crowdstrike API Base Url
- click on
Create New API client - Set a name for the new client
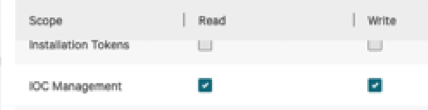
- Check
IOC Management Read / Write
Setup and Configure
The configuration can be supplied via
- an ini configuration file (Configuration template)
- command line parameters
- or a mix of both
During startup, the importer searches for the configuration in the current working directory. If the config is located in a different place or a multi-configuration workflow is used, specify that via commandline argument, eg.:
ticuraImporter --config=./config_test.ini
All configuration values available in the configuration can also be passed as command line arguments. Command line arguments can be used to entirely configure the client or to overwrite values from the configuration file:
ticuraImporter --config=./config_test.ini --app.loglevel=Debug
Command line arguments follow the schema section.parameter (see sample above).
To complete the configuration, open the configuration file and replace the following placeholders
TICURA_API_KEY: API Key was obtained from the Ticura portal during the feed setupCROWDSTRIKE_API_CLIENTID: Client ID obtained during the Crowdstrike client setupCROWDSTRIKE_API_SECRET: API Secret obtained during the Crowdstrike client setup
Enhanced Configuration
The indicator section in the configuration can be used to overwrite the default settings defined in the feed export format to match the customer's requirements.
By default, all IoCs will be exported for all platforms, applied_globally set to true, with action set to detect and mobile action prevent.
However, different settings can be specified within this section to overwrite those settings.
Please note: During the import, the IoCs will be compared with the IoCs fetched from the tenant, changes made via the UI will overwrite settings from export and configuration.
Running the Import
Save the configuration as config.ini in the same folder where the importer binary is located (or use previously described --config parameter). Execute the binary, eg:
./ticuraImporter
OR if the config is located in a different directory:
ticuraImporter --config=../config_test.ini
To automate the import, it is recommended to run the importer regularly using scheduling services such as cron (Linux) or Windows Task Scheduler.
Please Note: To run the ticuraImporter on MacOS, you must approve the execution once. To do so, run ./ticura_importer on the console, and you will see the below popup.
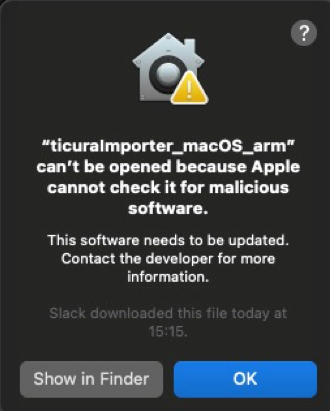
Confirm it by clicking on OK. Open System Settings and navigate to Privacy & Security. In the Security section, you will see that the execution was blocked.
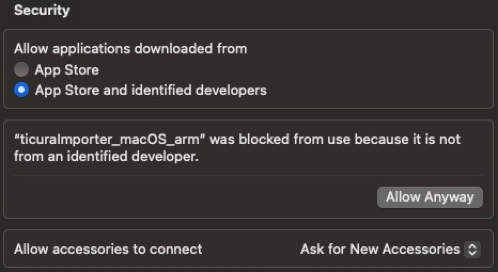
To allow the execution, click on Allow Anyway. From now on, the binary can be executed.
Check for Issues
To check the success or for errors during the import review the content of ticura.log, which is located in the same folder as the binary by default.
Sample for success:
2024-07-31T11:48:45Z info Metrics report: updates_otherSources: 0; updates_updatedIocs: 180206; update_errors: 0; update_success: 0; add_duplicates: 0; add_errors: 0; add_success: 39792024-07-31T11:48:45Z info IMPORT SUCCESSFUL
Sample for an error:
2024-07-31T12:54:04Z error IMPORT ABORTED; error connecting Ticura; got unexpected status code 400